How To Build a Home Climbing Wall in a Garage
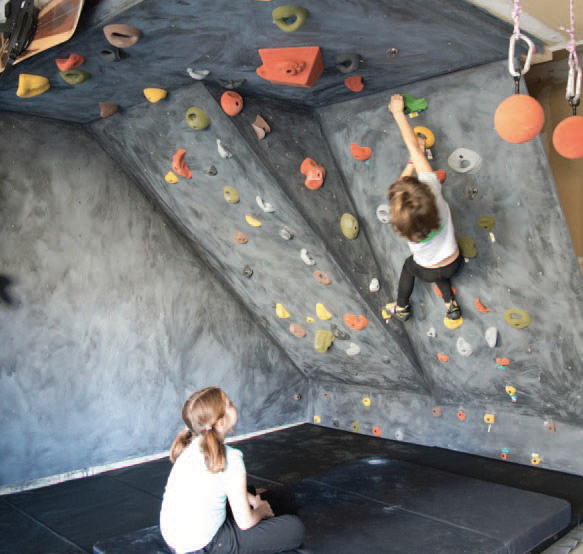 | Atomik How-To Series #10 Building a Garage Bouldering Wall STEP-BY-STEP INSTRUCTIONS Turning a space of blah into a place of happy awesome. | ||
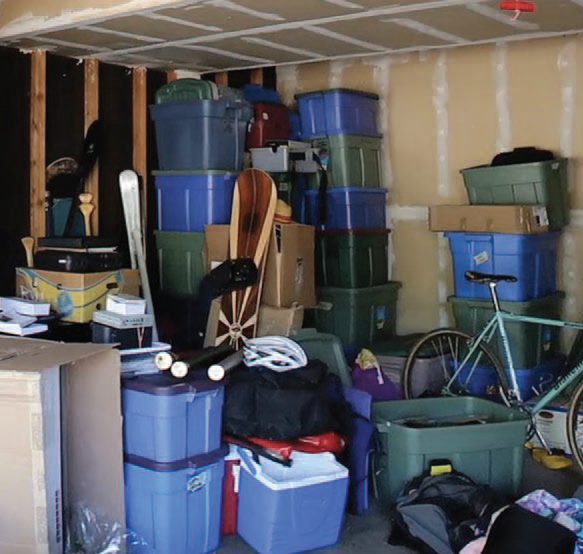 | SELECTING THE LOCATION OF YOUR WALL Things you should consider before building. Garages offer great space for climbing walls but you should decide whether space will be dedicated to the climbing wall or if you’ll be sharing the space with a car. If sharing, the angles should be thought out to accommodate the space needed for the garage door itself and the car. | ||
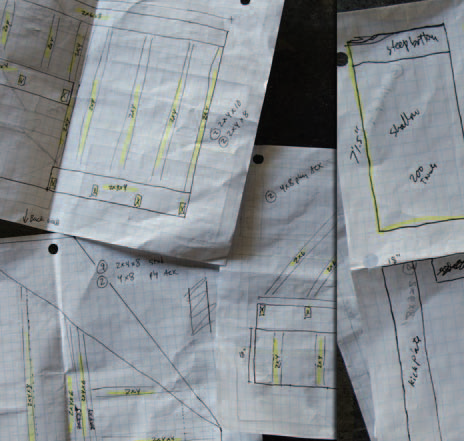 | PUTTING YOUR IDEAS DOWN ON PAPER The first step to making your dream wall starts with scale drawings and/or models. Use graph paper and a protractor to draw out your garage climbing wall. Scale models will also help you understand the limitations of your space. Though features like roofs may seem cool, clean flat overhanging walls of 20 degrees to 35 degrees offer the best variety. 45-degree garage climbing walls are very steep and work your core muscles. They do not offer much in terms of learning footwork unless you are climbing at an expert level. If you want a roof, we suggest getting some Volumes holds for variety because without, you are typically doing the same moves. | ||
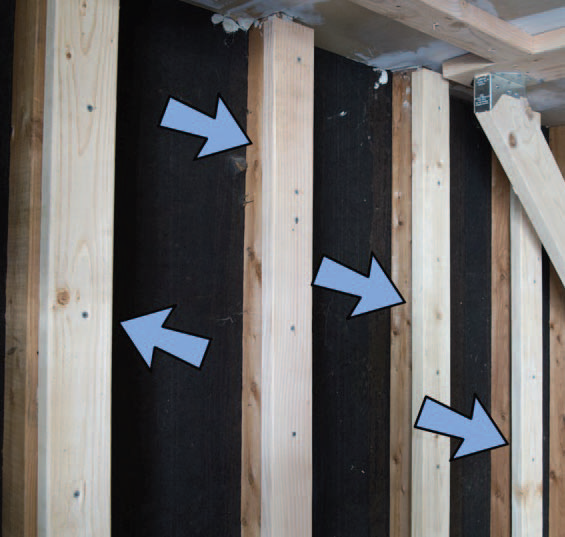
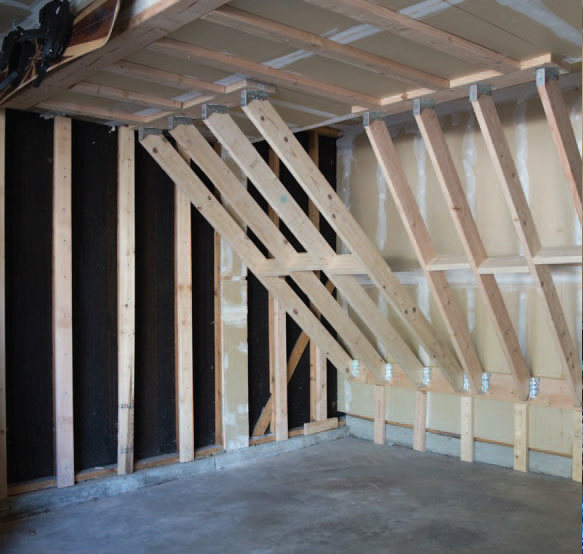 | FRAMING YOUR GARAGE CLIMBING WALL Choosing different sizes of framing lumber is appropriate. This photo shows 2” x 4” and 2” x 6” lumber being used since the wall is short in height. The taller the wall, the larger the framing lumber comes. Frame your wall using the 16” center rule. That’s 7 joists per 8’ wide section. | ||
 | SISTERS, SLEEPERS, AND HEADER JOISTS Plan your attachment points so groundwork becomes an option. Sisters, Sleepers, and Header Joists create easy attachment points for joist hangars. Lower-angled walls can be built in complete sections on the ground using this method. | ||
 | SISTERS, SLEEPERS, AND HEADER JOISTS (continued) Details make a difference. These Sistered 2” x 4”s have been attached to existing studs and joists. This method (also known as Furring Strips) creates easy-to-find locations for attaching your panels. These Furring Strips also create space behind the panel for the bolts of the climbing holds to enter. | ||
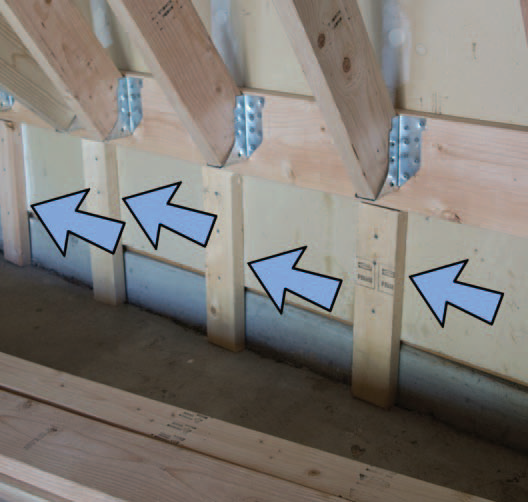 | SISTERS, SLEEPERS, AND HEADER JOISTS (continued) Sistered 2” x 4”s to existing studs for a Kick Plate on your wall. The Kick Plate creates room below your wall so that you can start boulder problems from a sitting position for one extra move. | ||
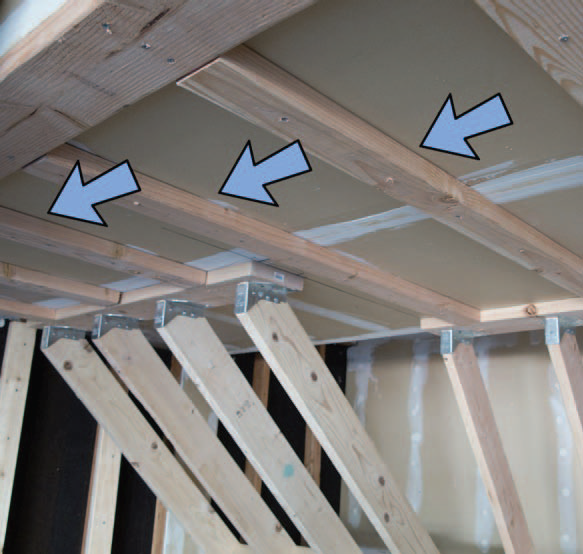
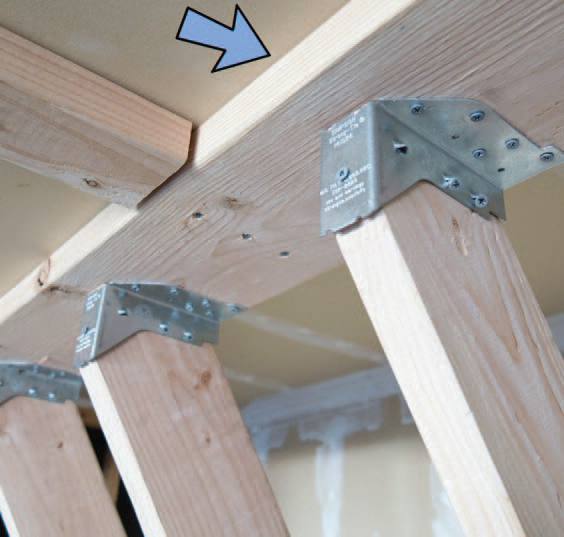 | SISTERS, SLEEPERS, AND HEADER JOISTS (continued) This 2” x 8” Header Joist was run perpendicular to the studs/joists. This creates a landing area for your 2” x 6” wall studs where your panels can attach. | ||
| BLOCKING Blocking adds strength and stability to joists. Locate blocks where the seams of your panels meet. This keeps the panels on the same plane and gives you a place for attachment. | ||
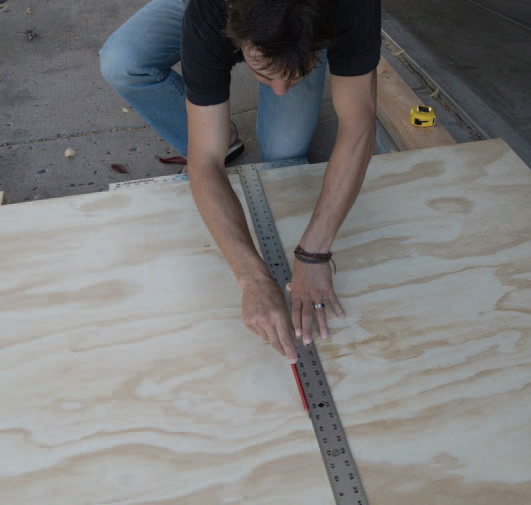 | MARKING YOUR SHORT CUTS The right tools for the job. A 48” Drywall T-square is a handy tool for marking shortcut lines. | ||
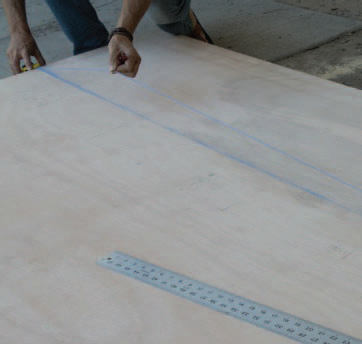 | MARKING YOUR LONG CUTS A chalk line is a tool used to mark long cut lines. | ||
 | MAKING STRAIGHT CUTS Using straight edges to run your circular saw along helps some builders. | ||
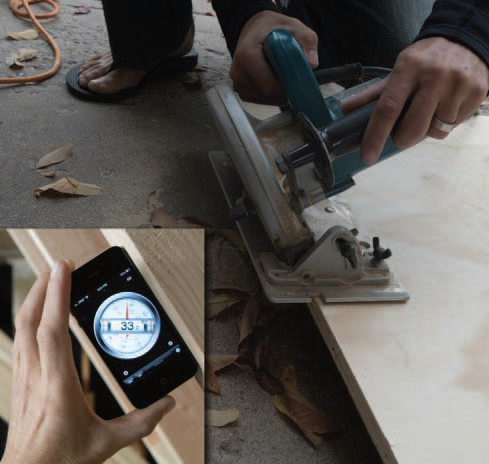 | MAKING FINISH CUTS Locate the wall studs and you’re in business. When building angled walls, plywood should be cut so that it fits snuggly. These types of cuts will create tighter joints thus less finish work in the end. We used a “clinometer app” on an iPhone to measure the angle of the wall to get the correct angle to cut the panels. | ||
 | DRY FITTING Fine-tune it before it’s final. Before investing time into painting and drilling out your angled panels, dry fit them. It’s more cost-effective to ruin a raw panel rather than a textured panel equipped with T-nuts. Attach panels with a few screws and make final adjustments. | ||
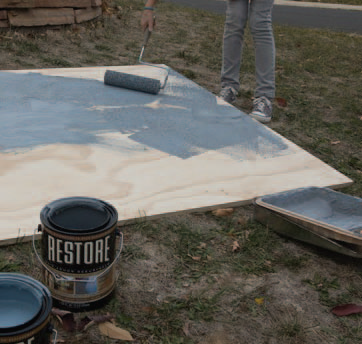 | PAINTING YOUR PANELS What texture to use and why. There are several textured paints available at your local hardware store. We’ve used Restore, Floortex, and several others. They are all anti-skid flooring paints. The basic principle for texture is for climbing holds to stick less to your wall. If you just paint without texture, your holds will rip off the paint (and a top layer of plywood) when you try to move them at a later date. | ||
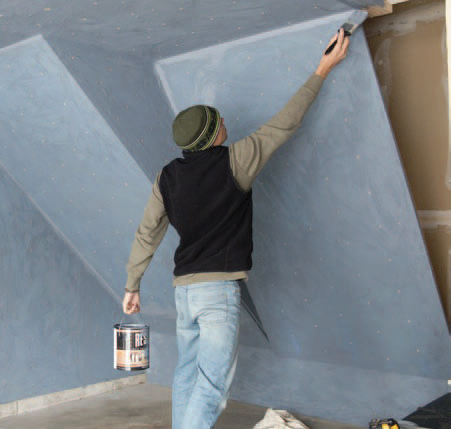
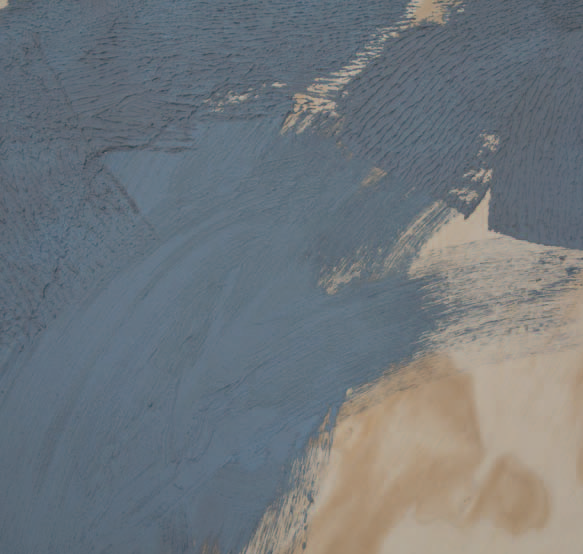 | TEXTURE TECHNIQUE The final look of your garage climbing wall is in the details. If you don’t prime your panels, you should use paint with a primer mix on raw panels. Roll out your textured paint using a high nap roller. Have a second person available to brush out the texture evenly while you are rolling. In painting, the general rule of thumb is to do 2 coats of paint. | ||
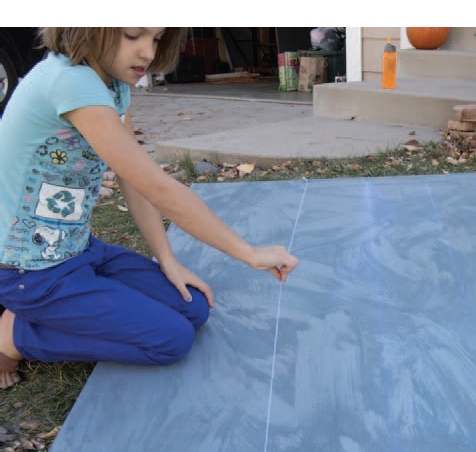 | PREPARING FOR PANEL FOR DRILLING T-NUTS 72 holes per sheet of plywood minimum. T-nuts are cheap so add, at a minimum, 72 T-nuts per sheet of 4’ x 8’ plywood. Use a chalk line and mark only one panel with the layout. A staggered pattern T-nut layout is best. T-nut locations should be located so they miss your framing studs. | ||
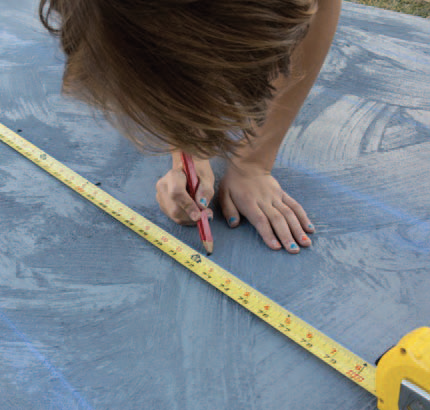 | PREPARING FOR PANEL FOR DRILLING T-NUTS (continued) Place T-nuts about 8” apart on the first row and then offset that pattern by 4” on the next line. | ||
 | DRILLING THE T-NUTS Gang the panels for efficiency. You can clamp anywhere from 3 to 6 panels together when drilling. Always drill from the front surface (the side you will climb on) through to the back of the panel. Blowouts will create an undesirable look so keep those to the backside. Use a 7/16” wood spaded bit or Forstner to drill the holes. | ||
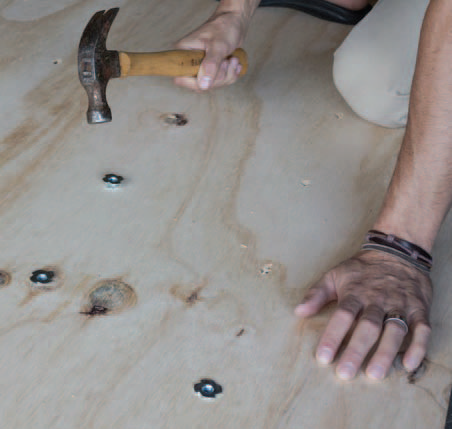 | HAMMERING IN YOUR T-NUTS (4-prong t-nuts) Not child’s play. Be sure to hammer the T-nuts in straight and to wear ear protection. | ||
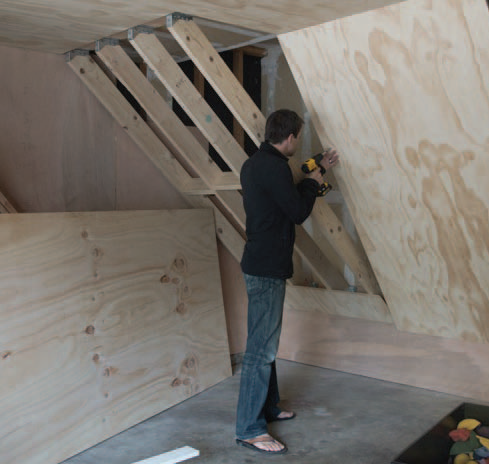
 | MOUNTING YOUR PANELS Pre-marking your wall where the studs lie will help eliminate guesswork when installing panels. Install panels using #8 x 2” deck screws every 6” to 8”. | ||
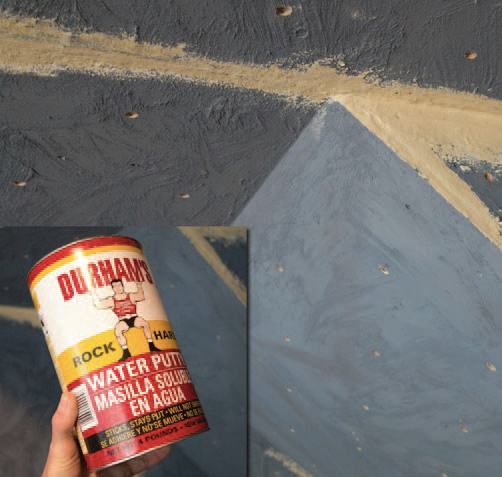 | FINISHING YOUR WALL Aesthetic touches to get the best results. Wood putty is nice to fill in gaps. Durham’s Water Putty is an excellent material. A thick mix is easier to work with. | ||
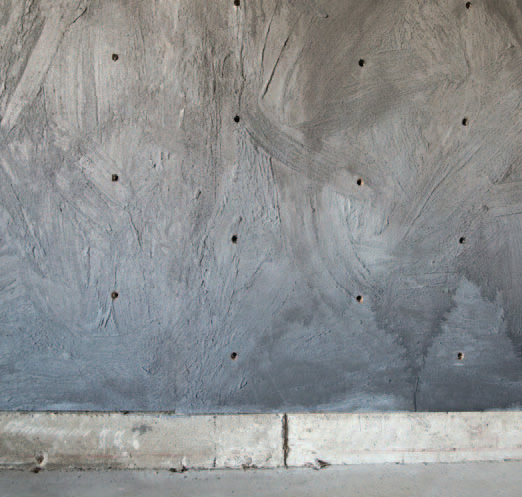
 | FINISHING YOUR WALL (continued) Finishing touch-ups. Touch up your garage climbing wall with leftover textured paint. | ||
 | FINISHING YOUR WALL (continued) Going the extra mile. Additional high light colors or even murals can be painted on your wall. Now go the extra mile to create depth and aesthetic appeal! | ||
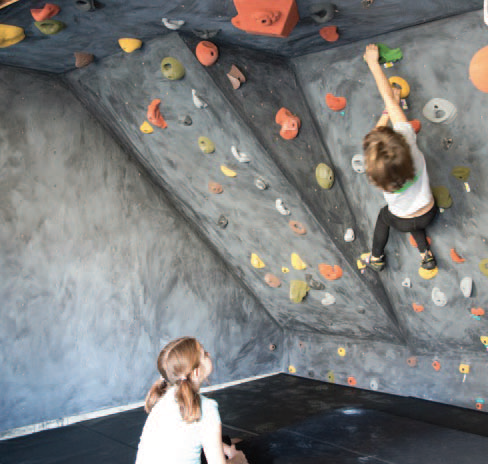
 | PUTTING THE CLIMBING HOLDS UP Keep it interesting. Small walls need lots of bouldering holds to keep them interesting. | ||
 | PUTTING THE CLIMBING HOLDS UP (continued) The final test. Now you’ll find out if your installation of the T-nuts went well. Hand-tighten the bolts into the T-nuts at first so there is no resistance. If you meet resistance, stop immediately and back out the bolt. Cross-threading a T-nut is a pain to get off the wall. Tighten down your hold once you are confident that the bolt when in properly. | ||
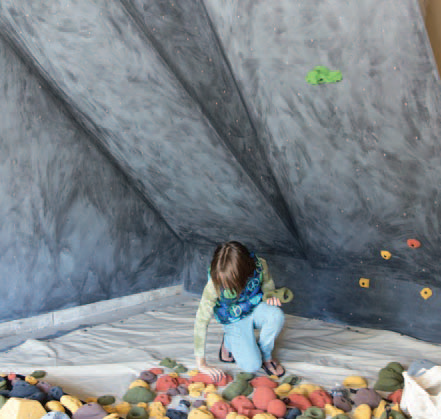
 | FINAL NOTES Soften the landing zone. Now that your holds are up, protect the climbers with adequate floor padding below. 2” to 4” padding is adequate for an 8’ tall wall however, adding stable extra padding never hurts. | ||
55 East 600 South, Provo, Utah 84606
Tel. 801-404-0280
[email protected]


Powered by nopCommerce
Copyright © 2026 Atomik Climbing Holds. All rights reserved.