How to Build a Hang Board for Grip Strength Training
 | ATOMIK How-To Series #11 Building a Climbing Training Board STEP-BY-STEP INSTRUCTIONS This door frame hangboard turns your doorway into a personal climbing training area.
| ||
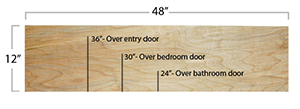
 | ATOMIK – Build Your Own Hangboard (11.2) LOCATION OF YOUR CLIMBING TRAINING BOARD Location means everything. Decide where to put your door frame hangboard. 24” to 30” is a common bathroom door width. 30” is a standard bedroom door; 36” is a standard entry door. Choose a location with headroom and a clear landing. At the top of the stairs is a bad idea due to pulling up and hitting your head or falling downstairs. Our example is a 12” H x 48” W hangboard above a hallway door. | ||
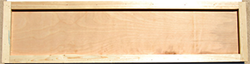
 | ATOMIK – Build Your Own Hangboard (11.3) SIZE OF YOUR CLIMBING TRAINING BOARD Cut 3/4” plywood to the needed size. Don’t cheat on plywood thickness. Reason 1: the height of the T-nut cylinder. Reason #2: structural integrity. 3/4” is the industry standard. Recommended height is 12” because it allows 2-3 rows of holds. With an 18-24” inch tall board, your hands will be almost 8 feet off the ground. It can be sketchy at that height and the lower holds will hit your forearms and elbows. Tip: No saw to cut plywood? No problem. Many hardware stores offer lumber cutting and sell pre-cut 3/4” Birch plywood in 2’ x 4’ sizes. Rip a 2x4 piece lengthwise, which gives you two pieces measuring 1’ x 4’. Now cut one to the above-door width you desire. | ||
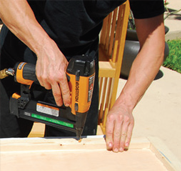
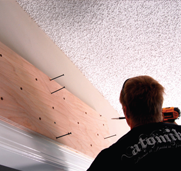
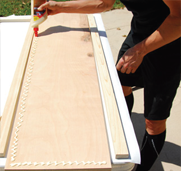 | ATOMIK – Build Your Own Hangboard (11.4) FURRING STRIPS Cut two 1.5-inch wide vertical furring strips** to the board’s height. Now cut 2 horizontal strips to the board’s width - less than 3 inches from the vertical strips. You may want to choose 1 x 2 ‘s (the actual size is 3/4 x 1.5 inches) because they are readily available at local hardware stores. Attach left & right side strips to the panel back using glue and finish nails. Next glue and nail the top & bottom strips. In this example, Elmer’s Wood Glue was used along with 1 ¼” finish nails. | ||
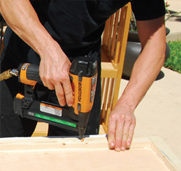 | ATOMIK – Build Your Own Hangboard (11.5) FURRING STRIPS Furring strips allow attachment bolts to pass through the hold, the climbing training board, the T-nuts, and into a space created by furring strips. This keeps bolts from touching the wall and “pushing” the hang board off the wall. Bottom line: Don’t skip the furring strips! They allow different sizes of holds and the different bolt lengths needed.
| ||
 | ATOMIK – Build Your Own Hangboard (11.6) TO PAINT OR NOT TO PAINT To look finished or leave it raw. Leave the panel raw at this point or finish it with paint or a stain sealer. Use a sander to take the sharpness off the board and smooth out the edges. If painting, prime first or use paint with primer added. Textured surfaces are nice to keep holds from spinning when you hang on them. Tighten the holds securely if you prefer not to texture your paint. | ||
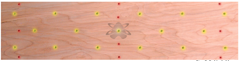
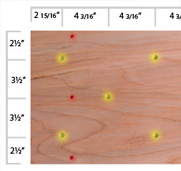 | ATOMIK – Build Your Own Hangboard (11.7) T-NUT LOCATIONS AND QUANTITY You can never have too many T-nuts on a hangboard. Below is a T-nut layout that allows a clear arm path on all 3 levels. You can tweak the layout any way you like, just be sure to drill holes so they miss the furring strips. YELLOW highlighted dots are T-nut holes drilled with a 7/16” wood bit.
| ||
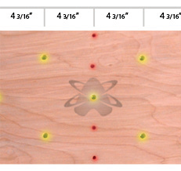 | ATOMIK – Build Your Own Hangboard (11.8) MOUNTING SCREW LOCATIONS AND SECURITY Locate the wall studs and you’re in business. RED highlighted dots are attachment points (#8 x 3.5” mounting screws.) The red screw dot positions may be different for your board due to the spacing of your wall studs. Put these screws where your studs are in the wall. For a wider door frame hangboard, the extra width often makes fastening into the wall studs around the door easier.
| ||
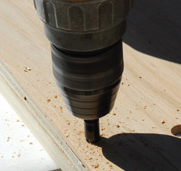
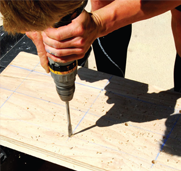 | ATOMIK – Build Your Own Hangboard (11.9) DRILLING THE T-NUTS Hide the blowouts. Drill 7/16” holes into the panel from the front side to the Backside. This keeps unsightly drill bit "blowouts" on the backside of our hangboard where you won’t see them. | ||
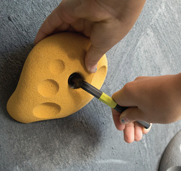
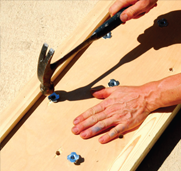 | ATOMIK – Build Your Own Hangboard (11.10) HAMMERING IN THE T-NUTS Noisy, fun, precise. Hammer T-nuts into the holes on the backside of the panel. Ear protection is a good idea. Be sure that the T-nuts go in straight. | ||
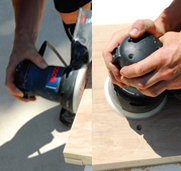 | ATOMIK – Build Your Own Hangboard (11.11) SANDING Sand the edges and the face of the board. | ||
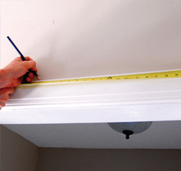
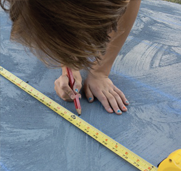
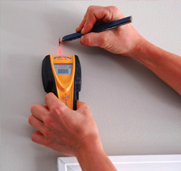 | ATOMIK – Build Your Own Hangboard (11.12) INSTALLING YOUR CLIMBING TRAINING BOARD Locate the studs over your door frame and mark the center of your opening.
| ||
 | ATOMIK – Build Your Own Hangboard (11.13) INSTALLING YOUR CLIMBING TRAINING BOARD Drill it. Countersink 3 holes per vertical stud and set the #8 x 3 ½” wood screws into the predrilled holes.
| ||
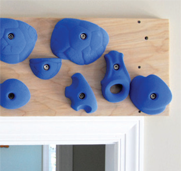
 | ATOMIK – Building a Climbing Training Hangboard (11.14) INSTALLING YOUR CLIMBING TRAINING BOARD Attach it. Center the board over the opening and attach your door frame hangboard onto the studs. | ||
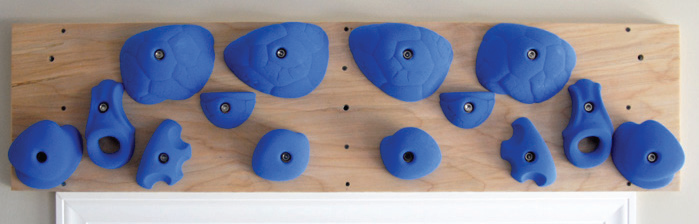
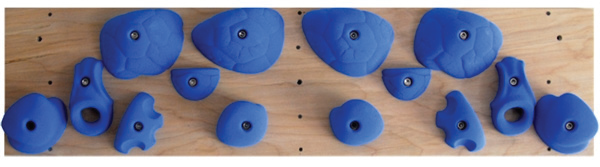
 | ATOMIK – Build Your Own Hangboard (11.15) THE FUN BEGINS Hold it up. The fun part is picking holds. All holds are sold and priced as pairs. For specific holds, this is where our system rocks. Into endurance mode during winter? Set your climbing training board up with slopers and nice rounded jugs and you can spend long easy hangs on the board. Getting ready for Hueco? Crimp the board out. Whichever way you want to train, simply switch the holds around. It’s best to have extra holds for diversity so buy yourself options. Next is a beginner hangboard set with big slopers, big jugs, and big pinches, with a couple of edges in there too. See the symmetrical layout? This is one of the thousands of variations. | ||
 | |||
55 East 600 South, Provo, Utah 84606
Tel. 801-404-0280
cs@atomikclimbingholds.com